Chicken Veggie Stew

Thank you to my friend Rebecca for requesting this off one of my recent instastories. I just love to use my slow cooker on a cold, dark night. The kitchen smells delicious all day, and it’s just such a warm and homey concept. Comfort food in every sense. No oil, no flour, no frying, no grease; this is a clean, healthy way to prepare a complete meal. Protein, veggies, a healthy grain, a homemade sauce, spices, and done. Feeds a whole family with ten minutes of prep. Can’t beat that.

I made this because I knew I wouldn’t have time to make my daughter dinner late afternoon like I normally do. I prepped it in the morning, set the slow cooker on high, and felt soooo satisfied all day that I knew dinner was done. I used things I had on hand.

Ingredients:

A pack of skinless chicken thighs

Six carrots peeled and cut into two inch pieces

Three sweet potatoes unpeeled and cut into chunks

Four parsnips peeled and cut into chunks,

Four celery stalks cut into two inch pieces

Two whole garlic cloves

A medium onion cut into quarters

A zucchini unpeeled and cut into large dice or half inch rounds

Six cups vegetable or chicken stock

A 16 oz can tomato sauce

A cup and a half of quinoa

Two tsp salt

Half a tsp pepper

A tbsp each of garlic powder and paprika

A tsp and a half of Italian seasoning

A dried bay leaf or a bouquet garni of any fresh herbs you might have on hand (rosemary, thyme, sage, parsley, dill).

Directions:

Place the onion, garlic, and sweet potatoes in first. Place chicken on top, then quinoa, then rest of veggies. Tuck in the bay leaf if using, or nestle in the bouquet garni.  Mix the stock, tomato sauce, and spices/seasonings. Pour slowly all over contents. Tightly secure the lid and set to high if morning of, at least six hours in advance. Set to low if preparing night before. Can omit the chicken and make this vegan🥕. Eggplant, butternut squash, chickpeas, or cauliflower would also be great additions here. Any whole grain such as Farro works beautifully too. Enjoy!

Screen Shot 2018-12-12 at 6.19.26 PM.png

Cauliflower with Shallots and Tarragon

DSC_0409.jpg

“Tarragon” really sounds like the name of a Dothraki character on Game of Thrones; am I right?? As an herb, it’s a strong, definitive flavor that adds beautiful depth to any dish. This is a clean, healthy side that can accompany any meal. It’s more jazzed up than standard roasted cauliflower, which personally, I’m kind of over. It’s just feeling too basic. Vegetables need very little enhancement when properly roasted, but we must mix it up occasionally. This would be great served room temp if made a day ahead. Just dress 20 minutes before serving. I used that multicolored mix of white, purple, and green cauliflower. It was calling my name at Whole Foods. I will say that after I dressed it, the purple cauliflower did bleed a bit. This bothered me a little because food discoloration makes me a bit nauseous, and also because it meant this couldn’t sit out very long, say at a buffet. Unless you don’t care, which is both entirely possible and more normal than my reaction. No matter; you can just use a mix of green and white, or just one of either of those variations. It obviously all tastes the same. Roasting the cauliflower in truffle oil brings out all that delicious, natural flavor. The truffle oil is a special layering of flavor. The tangy dressing lightens up the dish and is so flavorful.

Ingredients:

3 heads any color cauliflower cut into medium size pieces

8 tbsp finely chopped shallots (I think I used 6 whole shallots)

3-4 Tbsp truffle oil.

For the vinaigrette:

1/3 cup fresh lemon juice

1/3 cup olive oil

2 tbsp tarragon vinegar

2 tbsp additional finely chopped shallots

2 tbsp chopped fresh tarragon (mine came in a 25 oz pack)

3/4 tsp salt

1/4 tsp pepper

1/2 a cup of toasted slivered almonds or your favorite seed, such as pine nut or pumpkin.

Directions:

The goal with that is a warm crunch, achieve it however you prefer. Mix the cut cauliflower with the truffle oil and 5 tbsp of the chopped shallots. Roast on 400 until fork tender, caramelized, and golden brown, about 40 minutes. Not too soft or mushy. It should be tender but still a teeny bit firm.

Set aside to cool somewhat. This can be served warm or room temp. Make the vinaigrette; mix the oil, lemon juice, tarragon vinegar, fresh tarragon, additional shallots, salt and pepper. Toss gently with the cauliflower. Top with the toasted nuts or seeds before serving. Side note: there’s a broccoli emoji but not a cauliflower one.

Red Pepper Soup 🌶🌶🌶

DSC_0387.jpg

Peeps, we got a winner here!! This was a first for me and I must say I’m in love. Served hot or chilled, this soup is a sure to please starter to a special meal. Of course, it’s the star of its own meal too. Simply serve with a savory dressed green salad and you’re good to go 🥗. The best part about this soup is how truly easy it is. Most of my soups on the blog are easy; it’s a rare luxury to have the time to futz with a soup that has many steps. On a typically rushed weeknight, dinner has got to be unfussy; there’s simply too much going on. Cooking shouldn’t add to that chaos. After all, food is comfort. My daughter really loved this one. It was a nice change from the root vegetables I often use to make soups this time of year. And the color is just lovely; it was like a shade of vermillion.

DSC_0396.jpg

Ingredients:

Six large red bell peppers

A medium onion chopped

Three tbsp vegetable oil

One can of chickpeas drained and rinsed

Four to six cups of vegetable or chicken broth

A tsp of cumin

1 tsp dried basil

1 tbsp balsamic vinegar

1/4 tsp smoked chili powder

1 tsp salt

1/4 tsp pepper

Directions:

Chop and seed the peppers and set aside. Heat the oil in a large soup pot and sauté the onions. When the onions become translucent, add the balsamic, cumin, chili powder, and dried basil. Spicing the onions with the vinegar gives a fantastic undertone to the soup. It’s a great trick for really ensuring that your base will be special.

Sauté the spiced onions a minute or two more. Add the chopped/sliced peppers and a cup of broth. Sauté until softened about 15 minutes. You can alternate the sautéing with keeping the pot lid on to sweat the peppers. This speeds up the softening process.

Add rest of broth, salt and pepper, and the chickpeas. Bring to a boil, reduce the heat to low, and simmer for 20 minutes. Blend with a soup blender, adjust salt and pepper if needed, and serve. 🥗🥖.

DSC_0389.jpg

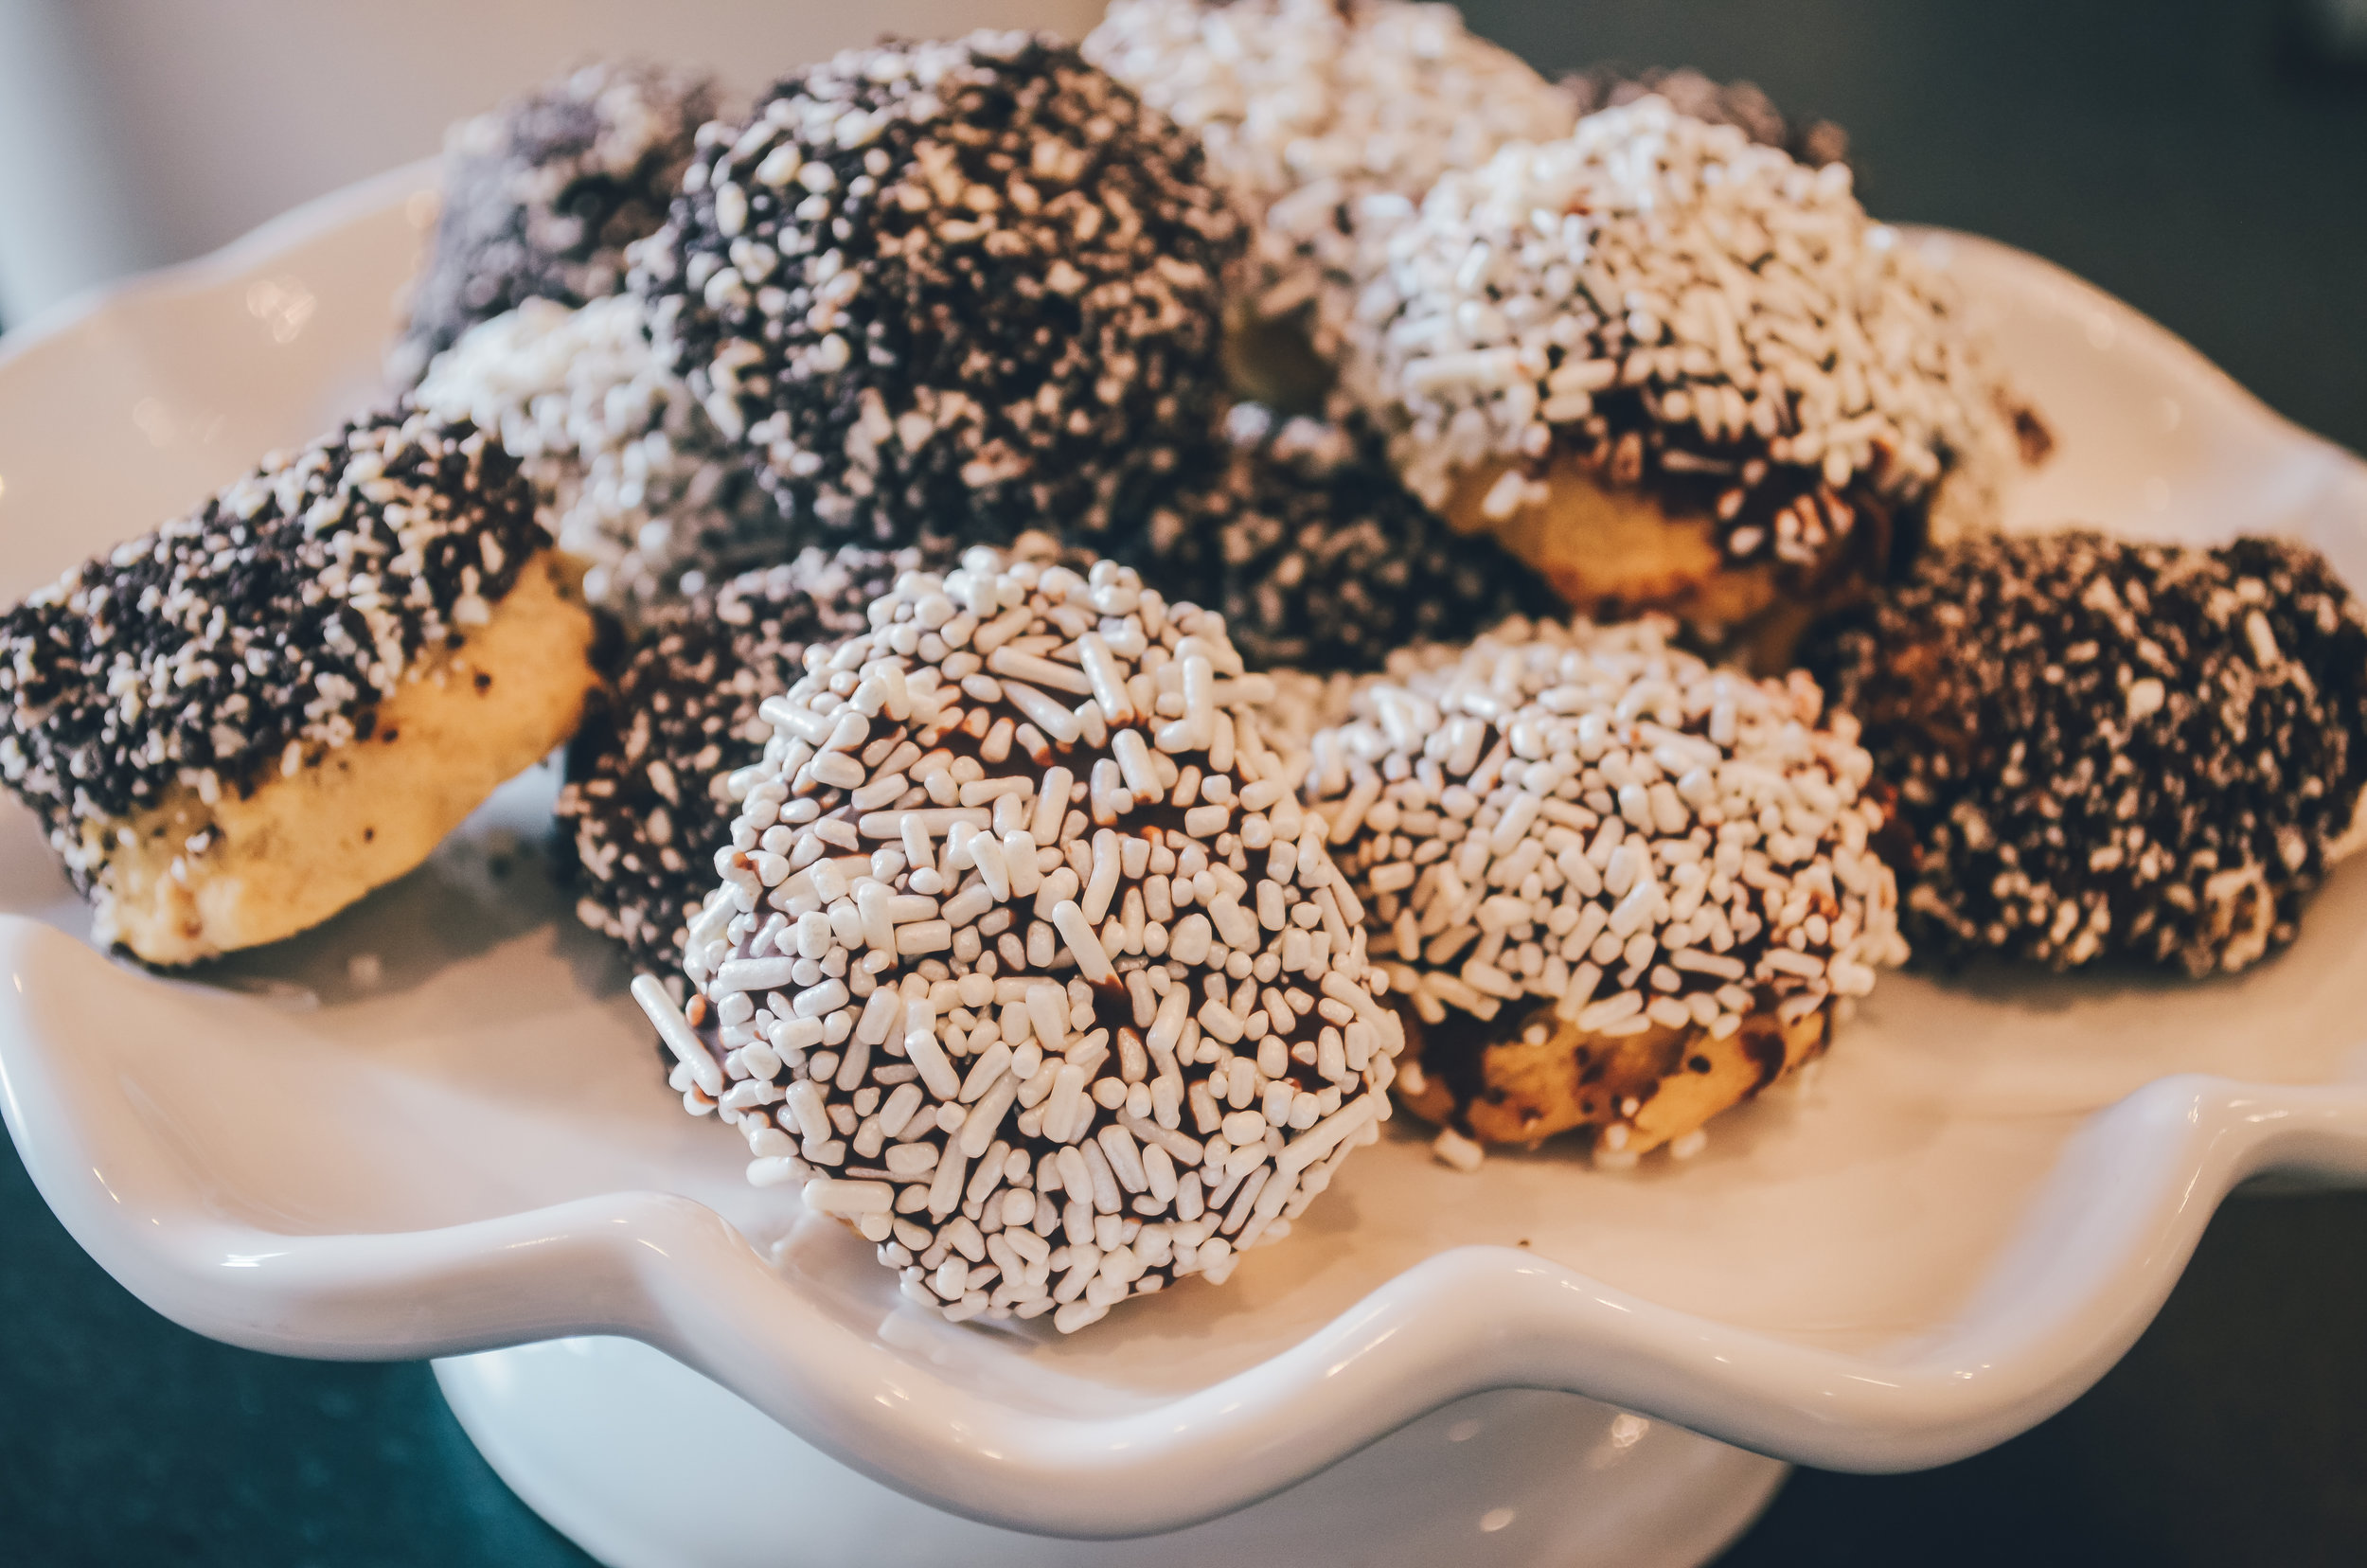
Shweddy Balls🍪🍫

DSC_0366.jpg

Admittedly this recipe didn’t turn out as pretty as I intended. I’m not sure why, since it’s so simple but it didn’t matter. It was a treat meant for my kids upon return from a trip and they loved it. Mission accomplished. That’s the great thing about food; as long as it tastes good it can occasionally be ok if it looks a bit jacked up.

These frozen cookie dough bites make really cute holiday desserts. You can play with different chocolates and toppings. Dip, roll, and freeze. Any kind of cookie dough works. Oatmeal raisin dipped in white chocolate and crushed nuts, double chocolate dipped in milk chocolate and rainbow sprinkles. This is definitely a recipe to have fun with. Just keep frozen in an airtight container until reach to serve.

Ingredients:

A box of frozen chocolate cookie dough balls

4 bars of dark chocolate

1/4 cup smooth peanut butter

Two cups crushed Oreos

Two cups white sprinkles.

Directions:

Melt the chocolate and peanut butter in a double boiler. Let cool slightly.  Dip each ball into chocolate and then roll in toppings. Place on a baking sheet that’s sprayed with PAM and covered in wax paper. Freeze until the chocolate is hard then transfer to a container.

DSC_0360.jpg

Roasted Cauliflower and Carrot Soup with Cabbage

DSC_0033.jpg

So if you watch my instastories you may have noticed I purée most of my soups. I prefer a chunky soup, but my daughters kinda don’t want to know what’s in there. In essence, I purée to camouflage the ingredients. God forbid a piece of onion should be visible. I love making soup, especially when it’s cold out, and I wanted to not bludgeon all these gorgeous vegetables to death with my soup blender. Guess what; my daughter liked it just the same! You never know until you try, right?

This beautiful golden soup with bursts of orange because of the carrots is hearty, healthy, and filling. Any soup served in mini crocs, should you happen to have a few, tastes extra yummy. I made these crunchy basmati rice cakes to accompany the soup. I was making rice but must’ve not added enough water, since the rice was too hard to serve. I didn’t want to waste it so voila; some creative repurposing turned the dried rice into homemade rice cakes. Alone or dipped into the soup, they’re like giant fresh rice croutons.

Ingredients for soup:

A bag of carrots, peeled and cut into half inch thick rounds

2 heads cauliflower cut into small pieces

Half a small head of green cabbage shredded

1 diced Spanish onion

4 garlic cloves coarsely chopped

4 boxes of vegetable stock

A bay leaf

A tsp and a half each cumin, turmeric, and dried oregano

Half a cup each chopped dill and parsley

A can of rinsed chickpeas

Directions:

Preheat oven to 400. In two separate pans, mix the carrots and cauliflower each with the minced garlic, olive oil, and a light amount of salt. Roast until the vegetables start to caramelize, the cauliflower will be longer.

Heat two tbsp olive oil in a very large soup pot. This recipe makes a ton. Cut in in half if you’re a normal person who doesn’t feel compelled to make soup for 90 imaginary people. Sauté the chopped onion, adding the turmeric, oregano, and cumin. The onions will be fragrant and yellow. When the onions are well sautéed add the roasted vegetables, stock, bay leaf, and two tsp salt and half a tsp pepper. Bring to a boil and simmer on low uncovered for 45 minutes. Add the chickpeas, dill, and parsley and heat for another ten minutes. Season to taste with additional salt and pepper if needed.

Instructions for rice cakes:

Two cups cooked white rice, slightly underdone. Mix the rice with two beaten eggs. Form the mixture into patties and fry in vegetable oil until golden brown on each side. Serve with soup, it’s kind of like a giant crouton that you can dip. The rice cakes can also be served like a cracker with the savory top of your choice, say a tapenade or hummus.

DSC_0041.jpg

Pasta with Roasted Broccoli, Tomatoes, Olives, and 🍋

DSC_0019.jpg

It’s so great today how there are different pastas made of alternate ingredients to suit varying dieting needs. This dish can be made with the pasta of your choice, but I gave chickpea rotini a try. It was good! It doesn’t change anything in the carb department but it’s made of chickpea protein so it sounded nutritious. This is such a clean pasta; roasted vegetables, briny kalamata olives, lemon zest, and a two step lemony vinaigrette. Roasting the broccoli and tomatoes really draws out their flavors. This is a great template for a pasta dish; any type and shape of pasta, any roasted veggie you have on hand, a savory boost like olives or capers, and a simple sauce of olive oil and fresh lemon juice. Add almost any toasted nut for crunch and warmth and you’re made in the shade. I also love adding raw greens like spinach or kale to warm pasta to make it literally a “pasta salad”🥗.   

Ingredients:

Box of your preferred pasta

3 cups of broccoli florets

2 cups halved cherry tomatoes

Jar of pitted kalamata olives halved lengthwise

Six minced garlic cloves

Quarter tsp crushed red pepper flakes

Quarter cup lemon juice

Quarter cup olive oil

Salt and pepper

Lemon

Directions:

Prepare pasta accordingly in a large pot of salted water. Preheat oven to 400. Toss broccoli with 4 cloves of minced garlic and 3 tbsp of olive oil. Roast about 20 minutes or until fork tender and edges start to crisp. Toss tomatoes with the remainder of the garlic, the red pepper flakes, and two tbsp olive oil.

Roast also about 20 minutes until the tomatoes start to split and shrivel. Mix the lemon juice, olive oil, a half tsp salt and a quarter tsp pepper. Whisk well. Pour half over warm pasta and mix.  Then add the rest of the ingredients, and toss gently with remainder of the dressing. Top with freshly grated lemon zest. Serve with the Lady Blaga minestrone soup and any of my salads for a complete three course meal. Cooking is fun, right?? ️

DSC_0022.jpg

Teriyaki Rice with Mushrooms and Asparagus 🍚

DSC_0024.jpg

This was sooo fun to make! I love combining a grain with vegetables for a fabulous side dish or vegan main. This is great hot or room temperature, and can definitely be made a day in advance. Choose between your favorite white or brown rice. I used white but it actually looked brown after I mixed it with the sauce. Sliced grilled steak, chicken, or a simple teriyaki salmon are the perfect protein accompaniments. Another idea is to put the rice in a bowl and top with a fried egg. For you vegetarians, serve with tofu. So many ways to enjoy this rice dish; isn’t it nice when we have choices in life?   

Ingredients:

Two cups white jasmine rice, cooked

A chopped white onion

A bunch of asparagus trimmed and cut into two inch pieces

8 oz sliced shiitake mushrooms

Toasted sesame seeds

A bunch of scallions chopped

1/4 tsp dried ginger powder

2 tbsp Mirin cooking wine to deglaze the sauté pan

3 tbsp toasted sesame oil

1 tbsp rice vinegar

3 tbsp teriyaki sauce (I like La Choy)

Note that while these were the basic measurements I used, they are subject to adding. I always cook dashing here and there, use more of whatever you feel you may.   

After the rice is cooked, mix in a tbsp of the toasted sesame oil. The hot rice will just soak up that flavor and retain it. Heat a large pan with 1 tbsp olive oil and 1 tbsp of the sesame oil. Sauté the onions until tender. Deglaze with Mirin as needed, continuously adding to keep deglazing and flavoring.

Add the mushrooms and asparagus and sauté until the asparagus is fork tender but still bright green, and the mushrooms are soft. Add some sesame oil as needed directly from the bottle. Don’t worry, you really can’t go wrong. Do it bit by bit. Start with less. Add the dried ginger to the sautéing veggie mix. Season with salt and pepper while sautéing too. Start with half a tsp salt and a quarter pepper. You can always add more but you can’t take away.

Mix the rice vinegar, teriyaki sauce, remainder of the sesame oil together. Add the rice to the veggie pan, pour sauce over, and mix gently. Turn off the heat, tossing to coat. Add more teriyaki sauce if needed. Transfer to a serving bowl and add toasted sesame seeds and scallions right before serving. Toasted oil and seeds are a must here. They are far richer in flavor than their bland counterparts.


DSC_0030.jpg

Salmon, Grilled Raddichio, and Spiced Onions

DSC_0052.jpg

Talk about a full, beautiful meal in a matter of minutes! Sometimes it’s fun for me to assemble a total meal concept instead of just making an individual Jesscipe. This healthy, clean meal is light yet substantial. Let’s definitely avoid that too heavy, nauseating, full to capacity feeling, shall we?

Ingredients:

Two salmon fillets

Salt and pepper

DSC_0057.jpg

Three big cloves of minced garlic

Fresh thyme with the leaves peeled off (hold a sprig of thyme in one hand and slide the leaves off downward with the other).

A large Spanish onion sliced into rounds (Spanish onions are more flavorful than regular ones)

One and a half tsp of smoked sweet paprika (This is important; it’s a different flavor than regular paprika. The Smokey flavor is outrageously delicious and gives wonderful depth)

Three tbsp of balsamic vinegar

Two tsp additional fresh thyme, since you’re peeling it for the fish anyway

Two heads of radicchio, halved and rubbed with olive oil

Two cups of mixed greens lightly drizzled with olive oil and balsamic, to compliment the onions

Directions:

Preheat oven to 400. Salt and pepper the fish. Rub it all over with the minced garlic and drizzle with olive oil. Sprinkle a generous amount of the thyme leaves and pat them in with the back of a spoon. Bake or roast the fish 12 to 15 minutes.

While the fish is cooking, heat a grill pan with olive oil. When the grill pan is very hot grill the raddichio halves on each side until there’s black grill marks. This results in both a wilt on the outside but still a crisp, crunchy core. Heat two tbsp olive oil in a large pan. Add the onion slices and sauté. Deglaze with the balsamic vinegar as the pan dries up, adding all the vinegar in stages. Add the smoked paprika and thyme and sauté until the onions develop this amazing caramelization. The smell is incredible.

Plate a piece of salmon over a cup of the lightly dressed greens. Add the raddichio halves on the side. Top the salmon with the glazed onions. Be so proud of yourself; you seriously just rocked the F out of this meal!

Trail Mix Bark

DSC_0050.jpg

This was easily my most requested Jesscipe from my last food shoot. It’s funny, the whole instastory thing felt so unnatural to me at first. It took me some time to embrace social media in general. I could not understand why anyone really cared what I was doing at 2:30 pm on a Tuesday, so it felt oddly self aggrandizing to talk about my daily activities. But that’s the biz, and though I don’t love hearing myself recorded (I think I sound like the love child of Barry White and Fran Drescher), I have come to really enjoy sharing through the stories. My favorite stories to film are the food because it’s fun to share ideas and tips. It feels organic to me since I’m actually really doing it anyway. It’s thrilling when I story a new concoction that seems to excite my followers, especially when it’s easy like this bark. If I can help you look like a rock star in the kitchen, no one needs to know that this took minimal effort. Your culinary secrets are safe with me. I promise you’ll knock their socks off with this one. I don’t love white chocolate, but I loved how holiday appropriate it would look here. White, snowy chocolate, woodsy granola, crunchy peanuts, and red dried cherries evoking that beautiful, wholesome holiday color palette. This is great to serve as a dessert after a special meal, or to keep in the freezer and have your overnight guests sneak a snack as they please. 2 AM? Sure, why not! This is also a lovely hostess gift if you’re not traveling far, since the chocolate will get melty after a little while.     

You’ll need:

A baking sheet pan with edges

Wax paper

Six bars of good quality white chocolate. I use Ghirardelli.

Two cups of granola

Half a cup of salted or honey roasted peanuts.

Half a cup of dried cherries or craisins.

3/4 cup of mini chocolate chips.

Directions:

Spray the baking sheet well with non stick spray. Press wax paper or parchment paper down firmly on top. Tape the edges if needed. Don’t spray the top of the paper. Set aside.

Melt the chocolate on top of a double boiler until smooth. Let cool slightly then pour on the baking sheet and spread around evenly with a sprayed spatula. Mix all components of topping together in a bowl and scatter evenly over the melted chocolate, pressing down gently.

Place sheet in the freezer for a couple hours. After it’s totally frozen break the bark into pieces of different sizes and put back in the freezer in an airtight container until ready to serve. I love the contrast of the white chocolate served on a dark platter. Play around with different chocolates and toppings. You can even serve a couple choices or an assortment. Have fun with this one! 


DSC_0047.jpg

Whole Wheat Yogurt Pear Muffins

unspecified.jpg

Whoa, that’s a mouthful of a title, but these muffins are mouthfuls of yum. I enjoy substituting pears for many recipes that call for apples. Autumn is the perfect time to play with pears. There are so many ripe, delicious varieties. These muffins are easy to make, and are perfect for breakfast, brunch, or a non terrible snack. They’re little, unlike many gargantuan store bought muffins that are let’s be real, akin to eating half a cake. One of these is truly harmless. The yogurt keeps them moist in a beneficial way, as opposed to using more oil. Swapping out some white flour for whole wheat lends a hearty flavor and cleaner composition. I usually find making muffins a bit annoying; the scooping and scraping of the dough at least a dozen times. But this didn’t feel that way to me. I kept the measurement at a dozen and the batter slid effortlessly into the muffin tin. If only the muffins didn’t slide so easily into my mouth. Yeah, you saw that coming, it’s fine.

Ingredients:

Batter-

3/4 cup lightly packed grown sugar

1/4 cup canola oil

1 egg

1/2 tsp vanilla extract

2/3 cup whole wheat flour

2/3 cup all purpose flour

1/2 tsp baking soda

1/4 tsp salt

1/2 cup non fat yogurt

2 pears

Topping-

1 TBS oil

2 TBS brown sugar

2 TBS whole wheat flour

1/2 tsp ground cinnamon

Directions:

Mix topping ingredients and set aside. Preheat oven to 325 degrees. Line the muffin tin with liners or spray with cooking spray. You can bake with the liners then remove before serving, since paper liners can look tacky. In a large bowl combine the brown sugar, oil, egg and vanilla. Mix well.

In another bowl combine the other dry ingredients. Add to the egg mixture with the yogurt. Just stir together. Over mixing will result in dense muffins. We want these babies light! Stir in the chopped pears. Fill each space two thirds full, then sprinkle a little topping on each.

Bake for 25 to 30 minutes until golden brown and the muffins spring up when touched. Yields 12. Freeze in an airtight container for up to two months.

unspecified-1.jpg

Autumn Pear Salad 🍐

unspecified.jpg

This wonderful seasonal salad is crisp, colorful, nutty, and fresh. I truly love creating new and interesting salads that “feed” off of the current season. The butternut squash here gives a fullness and gravity, while the pears keep it refreshing. The craisins and candied pecans further add dimension, sweetness, and warmth, while the thin slivers of red onion balance that out with their savory taste. What I really love is the dressing I made up. I like using a coordinating juice as a base, so I used pear juice here. The result was a lovely pear vinaigrette. It’s a cute, creative way to keep consistency. For instance, a classic lemony vinaigrette wouldn’t make sense, in that it would compete with and overpower the sweet elements. If you have a well stocked kitchen, you probably even have all of this on hand. If not, try to improvise with whatever fresh ingredients you do have (Unless you only have condiments. Do not make a ketchup salad. Go shopping🥗). 

Ingredients;

Six cups of spring mix lettuce. Romaine, butter, or red leaf would work too.

A cup of candied pecans.

Two cups of diced butternut squash.

A generous handful of craisins, two firm but sweet pears diced, any kind that isn’t mushy on the inside; the pears are needed for a fresh crispness.

A small red onion sliced into thin slivers.

Directions:

The only thing needed to be done in advance is that the butternut squash needs to be roasted in the oven on 400 until fork tender, about 25 minutes. Cool the squash at least partially before adding it in. It’s ok if it’s a bit warm. Mix all ingredients in a large bowl. I like a lot of mixing room so I always do it in one of those giant aluminum tins.

Dressing:

A quarter cup of lemon juice

A quarter cup of olive oil

Half a cup of pear juice

Half tsp salt, quarter tsp pepper

2 tbsp champagne vinegar

Whisk all very well. Add the dressing to the salad starting with a third cup. You may not need more. The goal is a lightly dressed salad. No dousing or drowning. Add more as needed, saving rest for future. You could even use the extra as a marinade for chicken or fish. This is a fantastic dinner when it follows a soup.

unspecified-1.jpg

Fastest Flat Bread Pizzas EVER

unspecified-1.jpg

This Jesscipe was created to feed the hordes of kids pouring in and out of my house over this last round of holidays. Sabbath and the holidays, in my humble opinion, are the nicest parts to observant Judaism. I love watching my children truly interact with their friends without the awful temptations of electronic devices. They play sports, board games, and just sit around and talk. I love being one of the neighborhood homes that acts as a common meeting space for all my kids  friends. Always happy to feed their various crews! It takes efficiency when I need to pump large quantities, and this joke of a recipe does the deed well.

A variety of flat bread pizzas broiled for a couple minutes each. Slice and serve. I used whole wheat lavash bread, but any Lafah style or even pita breads cut in half will do. I made classic, white, and pesto mozzarella pizzas. Each one cut into about four pieces and I served them in squares in a checkerboard pattern on a large rectangular platter. My adult friends loved this too. Everyone just grabbed a slice and ate. So easy and impressive.

Ingredients:

A pack of lavash bread; the one I used came with five or six large pieces.

Tomato or marinara sauce.

Pesto.

Shredded mozzarella, and shredded cheddar cheeses.

Directions:

Preheat the broiler in your oven, adjusting the top rack so that it’s on top but not in the broiler’s face. Close but not too close. Lightly oil a large aluminum pan. Take one lavash and top with tomato sauce and shredded cheddar, another topped only with shredded mozzarella for the white pizza, and the third with pesto and mozzarella. When you do this, leave a one and a half inch border of bread.

Place the pizzas in the pan, you’ll probably need to do this one at a time, and drizzle with olive oil. Feel free to add your favorite sautéed veggie to any of the pizzas. Broil each pizza for just several minutes, checking after 3 minutes and keeping watch so they don’t burn. It’s ok if the edges get dark. It’s kinda unavoidable. When the cheese is golden brown and bubbly then peace out the oven. Let cool slightly and slice with a round pizza cutter, one of the funnest kitchen tools everFresh homemade pizza in mere minutes? That’s amore️️!

unspecified.jpg

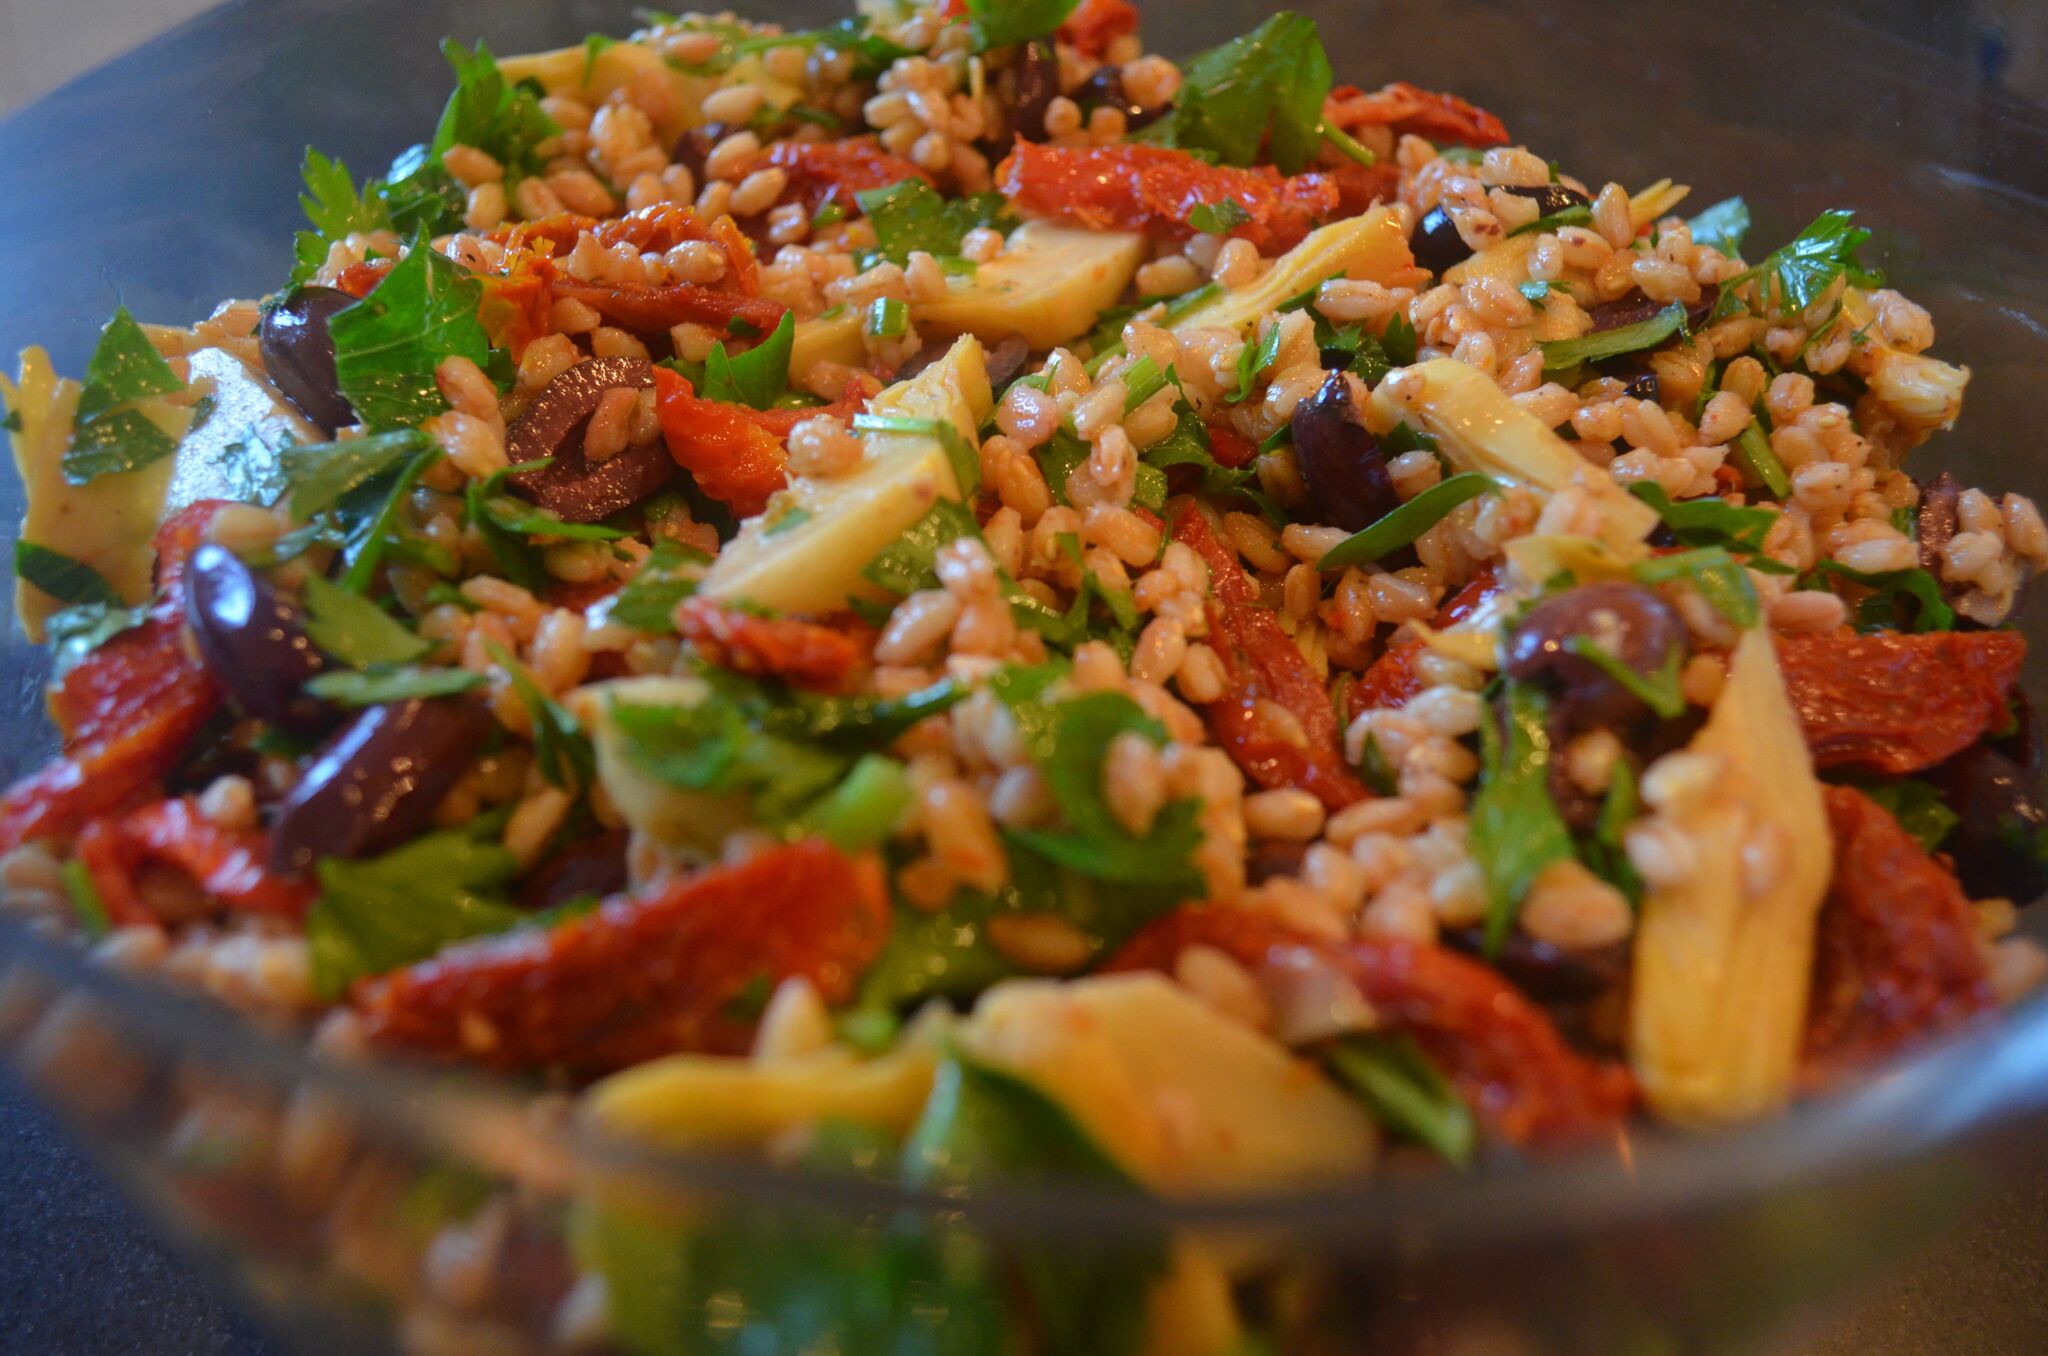
Savory Farro Salad

unspecified.jpg

This is not unlike a Farro Salad I posted awhile back. That one had spinach, roasted tomatoes, and toasted pine nuts. This one keeps the Farro as a base and uses tangy, briny vegetables and olives to jazz it up. The amazing secret to this recipe is that when I drain the sundried tomato jar, I reserve the wonderful flavored oil and use that in my dressing. It’s built in intense flavor. Genius, right? That oil is like colostrum, it’s liquid gold. This salad is great prepared a day in advance and is always a huge hit as both a side or vegan main. Top with tofu for a complete meal.

Ingredients:

A bag of Farro cooked al dente according to package directions. For added flavor, I cook the Farro in boxed vegetable broth. Drain, rinse with cold water to stop the cooking process. You want grains with bite that separate.

A jar of marinated sundried tomatoes, with oil reserved and tomatoes julienned as best as you can. I slice mine into skinny thirds.

Two jars of marinated artichoke hearts, artichokes cut in half length wise.

A jar of black pitted kalamata olives halved lengthwise.

A packed cup to a cup and a half of chopped parsley. I actually forgot to do this when I photographed this recipe for the shoot, but I intended to add a bunch of finely chopped scallions. I recommend that as a nice fresh counter to the jarred vegetables. Always a balance, my Loves.

Dressing: half a cup of the sundried oil, half a cup of fresh lemon juice, one tsp salt, half a tsp pepper. That’s all you need since the oil does all the work.

Directions:

Whisk well and pour a third on the warm Farro so it can absorb it alone. Let that sit a bit if you can before adding rest of dressing and the chopped veggies. Mix in the fresh parsley right before serving for maximum flavor and greenery. If making in advance, store each veg separately in their own container, with the remainder of the dressing in its own container too. Bring all to room temp, mix, and serve.

unspecified-1.jpg

Meatloaf and Mashed Potatoes 🥔

No meatloaf emoji?? Let’s work on that.

I’m kicking it old school here with this timeless retro classic. Meatloaf was a staple in every household in the 1950’s, so over the years took on an outdated, kitschy stereotype. But its sooooo good and deserves a comeback. Plus, it’s a snap to make. What’s outdated about a fast, hot, delicious meal? Nada.

I’ve been making this since before I had kids. It’s nice to go back to our oldies but goodies. It feels homey and safe, the way home-cooked food should feel. I like to serve this with mashed potatoes. Rice or quinoa work nicely too. A simple, clean starch that will let the meatloaf have the spotlight. A side dish sometimes just serves as a support.

Ingredients:

A pound (and a quarter) of extra lean ground beef or turkey

One egg lightly beaten

A tbps each of garlic power and paprika OR Jerusalem spice. If using paprika you can add a tsp of cumin.

Half a tsp dried thyme

A tsp salt and tsp pepper

Preheat oven to 350. Line a loaf pan with foil, spraying the foil well with nonstick spray. Gently mix all ingredients and pour into pan. You can sprinkle any type of breadcrumbs on top if you like. Either way, drizzle olive oil on top of the meatloaf to crisp it up. It makes a difference. Bake for one hour. Slice and serve. Feel free to add half a cup of your favorite finely diced veggie, such as onions, any color pepper, or carrots. Not necessary, but I’d give it a light sauté for a couple minutes to start to enhance the flavors.

While the meatloaf bakes, peel and chunk six potatoes, doing more for a larger group. Everyone has a version of mashed potatoes they love, but after boiling the potatoes in salted water until soft, I mash mine with homemade chicken stock and sprinkle on some garlic powder. This eliminates unhealthy margarine and packs it with flavor. Add the stock a half cup first, then add more little by little according to your preferred texture. I like mine chunky. Make sure you serve this in pearls and an apron with a psychotic smile plastered on your face. You know, the one hiding the evil suburban thoughts swarming in your head that die with Ambien each night. Not that I would know...

classic-meatloaf-d103160_horiz.jpg

Joyful Energy Bites with the Mindful Snacker

DSC_1622.jpg

In an effort to keep moving in the direction of editing and cleaning up all areas of my life, I collaborated with The Mindful Snacker from the Upper West side. The MS, or Daniella, is so sweet and was brimming with excellent ways for how to snack responsibly. Never sacrificing taste or texture, Daniella presented my pantry with an astonishing array of chips, cauliflower pretzels, roasted chickpeas, cake mixes, and crackers made from guilt free, super pristine ingredients. Sometimes you really just need to munch on stuff like this, and when we don’t have the right options in front of us, we will pick at the wrong things. This will always lead to self loathing, and in 2018 that is entirely avoidable. There are so many wonderful products on the market and the overload of information can feel overwhelming.

The Mindful Snacker gave my pantry a complete makeover, streamlining all my family and I need to know about quality, healthy snacks. There are ingenious ways to sneak veggies into snacking. This was just knowledge I was unaware of, but I’m always ready to learn. Daniella was the perfect person to educate me on how to better take care of my body. I don’t have to cut out snacks, I just can choose the right ones. One of the highlights of this lovely visit was Daniella’s homemade energy bites. Rich, nutty, chocolatey bites that I stored in the freezer and noshed as needed. I need chocolate and nuts every day. These super packed, delicious treats satisfied my craving. I’m thrilled to share her recipe with you, as she was generous enough to spread her nutritional love with the Lady Blaga foodies. Daniella has tons of tricks up her sleeve for healthy, happy eating. Bite beautifully! 🥜

Screen Shot 2018-10-04 at 1.42.02 PM.png
Screen Shot 2018-10-04 at 1.42.43 PM.png
DSC_1620.jpg

Lentil soup

I love getting approached for my recipes after they go up on instastories. Often times I’m just winging it and it’s good video content, and then I go back and make up the actual recipe. This is one of those times. I needed an easy, hearty soup for the Yom Kippur break fast meal. After a fast, though it’s tempting to shove everything not nailed to the floor into your mouth at breakneck speed, it’s the wiser move to ease your digestive system back into action with slow, gentle intake. This is always a better idea, fast or no fast. This soup was a hit with both the adults and kids at the table. If it needs to be thinned out a drop if reheating, just add some vegetable broth. This is totally vegan. 

Ingredients:

Two boxes/8 cups vegetable broth

A cup each chopped onions, carrots, parsnips, and celery

Two cloves of garlic finely chopped or minced

A bag of dried red lentils

A cup of finely chopped parsley

Two tsp of Salt and a tsp of five ground pepper, adding more to taste after cooking

A large whole bay leaf

Directions:

Heat a couple tbsp olive oil in a large pot. Add onions and sauté until golden brown. Add some vegetable broth or even white cooking wine to prevent a dry pot/burned onions. Add garlic and sauté when onions are almost done.

Add chopped carrots, parsnips, and celery (I had fennel so I threw that in too), cover and sweat until fork tender. Maybe five minutes tops. Keep adding broth if needed to unstick the vegetables. Add the bag of lentils, the broth, bay leaf and seasonings. I think a tsp of cumin would be a nice optional addition of flavoring if you like that spice.

Bring to a boil then simmer on medium low, covered, for a half hour until lentils are soft. Add chopped parsley and simmer ten minutes more. Turn off heat and remove cover. I like to release some steam before I purée. When soup is no longer piping hot, purée (optional!) with a handheld soup blender. Remove bay leaf first of course. If you like a chunkier soup, no need to blend. I have to camouflage veggies in my house. Since this is a thicker, heavier soup I served smaller portions in mugs. 🥄. This recipe is interchangeable with green or yellow split peas.

This is for you, Drorit

lentils.jpg

Pasta With Herbed Roasted Carrots 🥕🥕🥕🥕🥕

i-MgMVz8r-X4.jpg

Making pasta dishes is newer for me. I used to chiefly cook for a very picky eater who had a very long list of things he refused to eat, and a short list of things he would. So it was just more logical for me to have to work around that. All that chopping and mixing for it not to be received was kind of a waste of time and effort. Also, I used to really never touch pasta cuz of the whole carb thing. Now I do enjoy it occasionally, since many of my eating habits have changed. Out went meat and chicken, in went more fruit despite my former trainer telling me it’s loaded with sugar. Oh please, it’s natural! Out went anything with dietetic chemicals, in went higher fat content but clean and pure. Admittedly, it’s still a major mind F to eat carbs.

After years of living with the ghost of Dr Atkins sitting on my shoulder, there is a part of me that thinks I will instantly gain five pounds if I eat some bread or pasta. It bothers me that it bothers me. But as I continue to connect to my body through yoga and mindfulness, and as I learn that not only have I not gained weight but actually am leaner now, I’m able to expand the my own list of foods that I enjoy. I ate the same things for years! Such a robotic menu, which is so ridiculous given the beautiful, wide range of things we can put into our bodies. Our options are limitless. Especially for someone who loves to cook and experiment! It was another way I didn’t even realize I was closing myself off. Expansion, expansion, expansion, while maintaining yourself as you welcome new experiences into your life.

I’d never tell you, my dear Readers, that it doesn’t matter what we look like on the outside, and that you should eat whatever whenever. It does matter! Our bodies were gifts given to us for a finite period of time, to serve human purpose. They were given and will be taken away. They are ours temporarily to care for. A fit, healthy body with toned muscles is really important. Ignoring the care of our bodies is the same thing as never brushing your teeth. Everything we have requires care and attention. It all stems from awareness and appreciation. “Thank you for trusting me with this body. It’s an honor to care for it.”

Part of taking care of our bodies is being gentle to it too sometimes, and so eating a pasta with fresh, clean, seasonal ingredients is a good thing! With herbs plucked straight from my garden, this is definitely “farm to table”. Fine, it’s “backyard to table” but you get it. Plus, yoga does wonders for metabolism, so my newer induction of some more carbs into my diet has been dealt with through that. All the twists and turns, different angles, and stretching really gives the organs it’s own workout. It kicks them into high gear. At this point, if it’s clean and portioned, I’m in. My body is better now than it was when I only ate carbs twice a week with just an apple and half a grapefruit as my fruits. BORING. No one is giving a eulogy that includes “bless her, she never ate pasta. She stuck to her egg whites and cried herself to sleep”. Additionally, since I’m eating more delicious carbs and fruit, my craving for sweets has all but disappeared. I was a major dessert person always. It feels good to be letting that go. Sure, the occasional cookie is needed. But I’m really ok with just once in awhile.         

Pasta is so fun to play with. It’s a blank canvas. You can really do so much with it, and it never needs to be complicated. Everyone loves it. It feeds large crowds. It stores well in the fridge. It’s versatile, transportable, and can be a side or a main. Ok, shall we?

Ingredient:

A large bag of carrots, peeled and cut into half inch slices on the bias.

A box of short pasta, white or whole grain. I used white orecchiette and it came out beautifully.

Salt, pepper, zhatar, cumin. A half a cup each of tightly packed fresh sage leaves, parsley, and chives. The sage should be julienned into thin slices, the others can be chopped regularly.

Vinaigrette; half a cup each of lemon juice and olive oil, 2 tbsp of tarragon vinegar, half a tsp salt and a quarter pepper.

Directions:

Set oven to 425. Toss sliced carrots in a pan with some salt and pepper, and two tsp cumin and a tbsp of zhatar. Adjust and add more if desired. I like it quite seasoned and flavorful. I don’t measure, I just palm it. So start with this and add. Roast carrots on top rack until slightly shriveled with browning edges. We want them to be caramelized but not too soft. Fork tender. Prepare pasta al dente. Whisk together the vinaigrette. Combine all when ready, and gently mix in the fresh herbs. I like lots of herbs and greenery, so like the spices, def add more if you feel you need it. Trust yourself. The bright orange and green colors here is what makes this dish really pop. Garnish with three whole, fresh sage leaves in the middle. Always garnish with an odd number, it looks more natural that way. Enjoy this. Truly enjoy this. Be proud of what you just accomplished in the kitchen. Be proud of your choices to nourish yourself and those you cook for. Serve with love.


i-jWhJHKL-X4.jpg

Spinach Linguini with Marinated Tomatoes and Capers

i-vzcQQSp-X4.jpg

 Yum, right??? The title alone is mouth watering. Which is how food should be; tantalizing out the gate. This is why I prefer cookbooks with photos. I find it very hard to cook towards a goal without a delectable visual. This dish was inspired by Martha Stewart from her “Meatless” cookbook. This is an excellent, beautiful cookbook that I highly recommend. Hundreds of clean, healthy options. The joy for me here was being able to use fresh tomatoes and basil from my garden. Fresh basil is one of most delightful, invigorating scents. It’s a pain in the butt to clean, but so worth it.
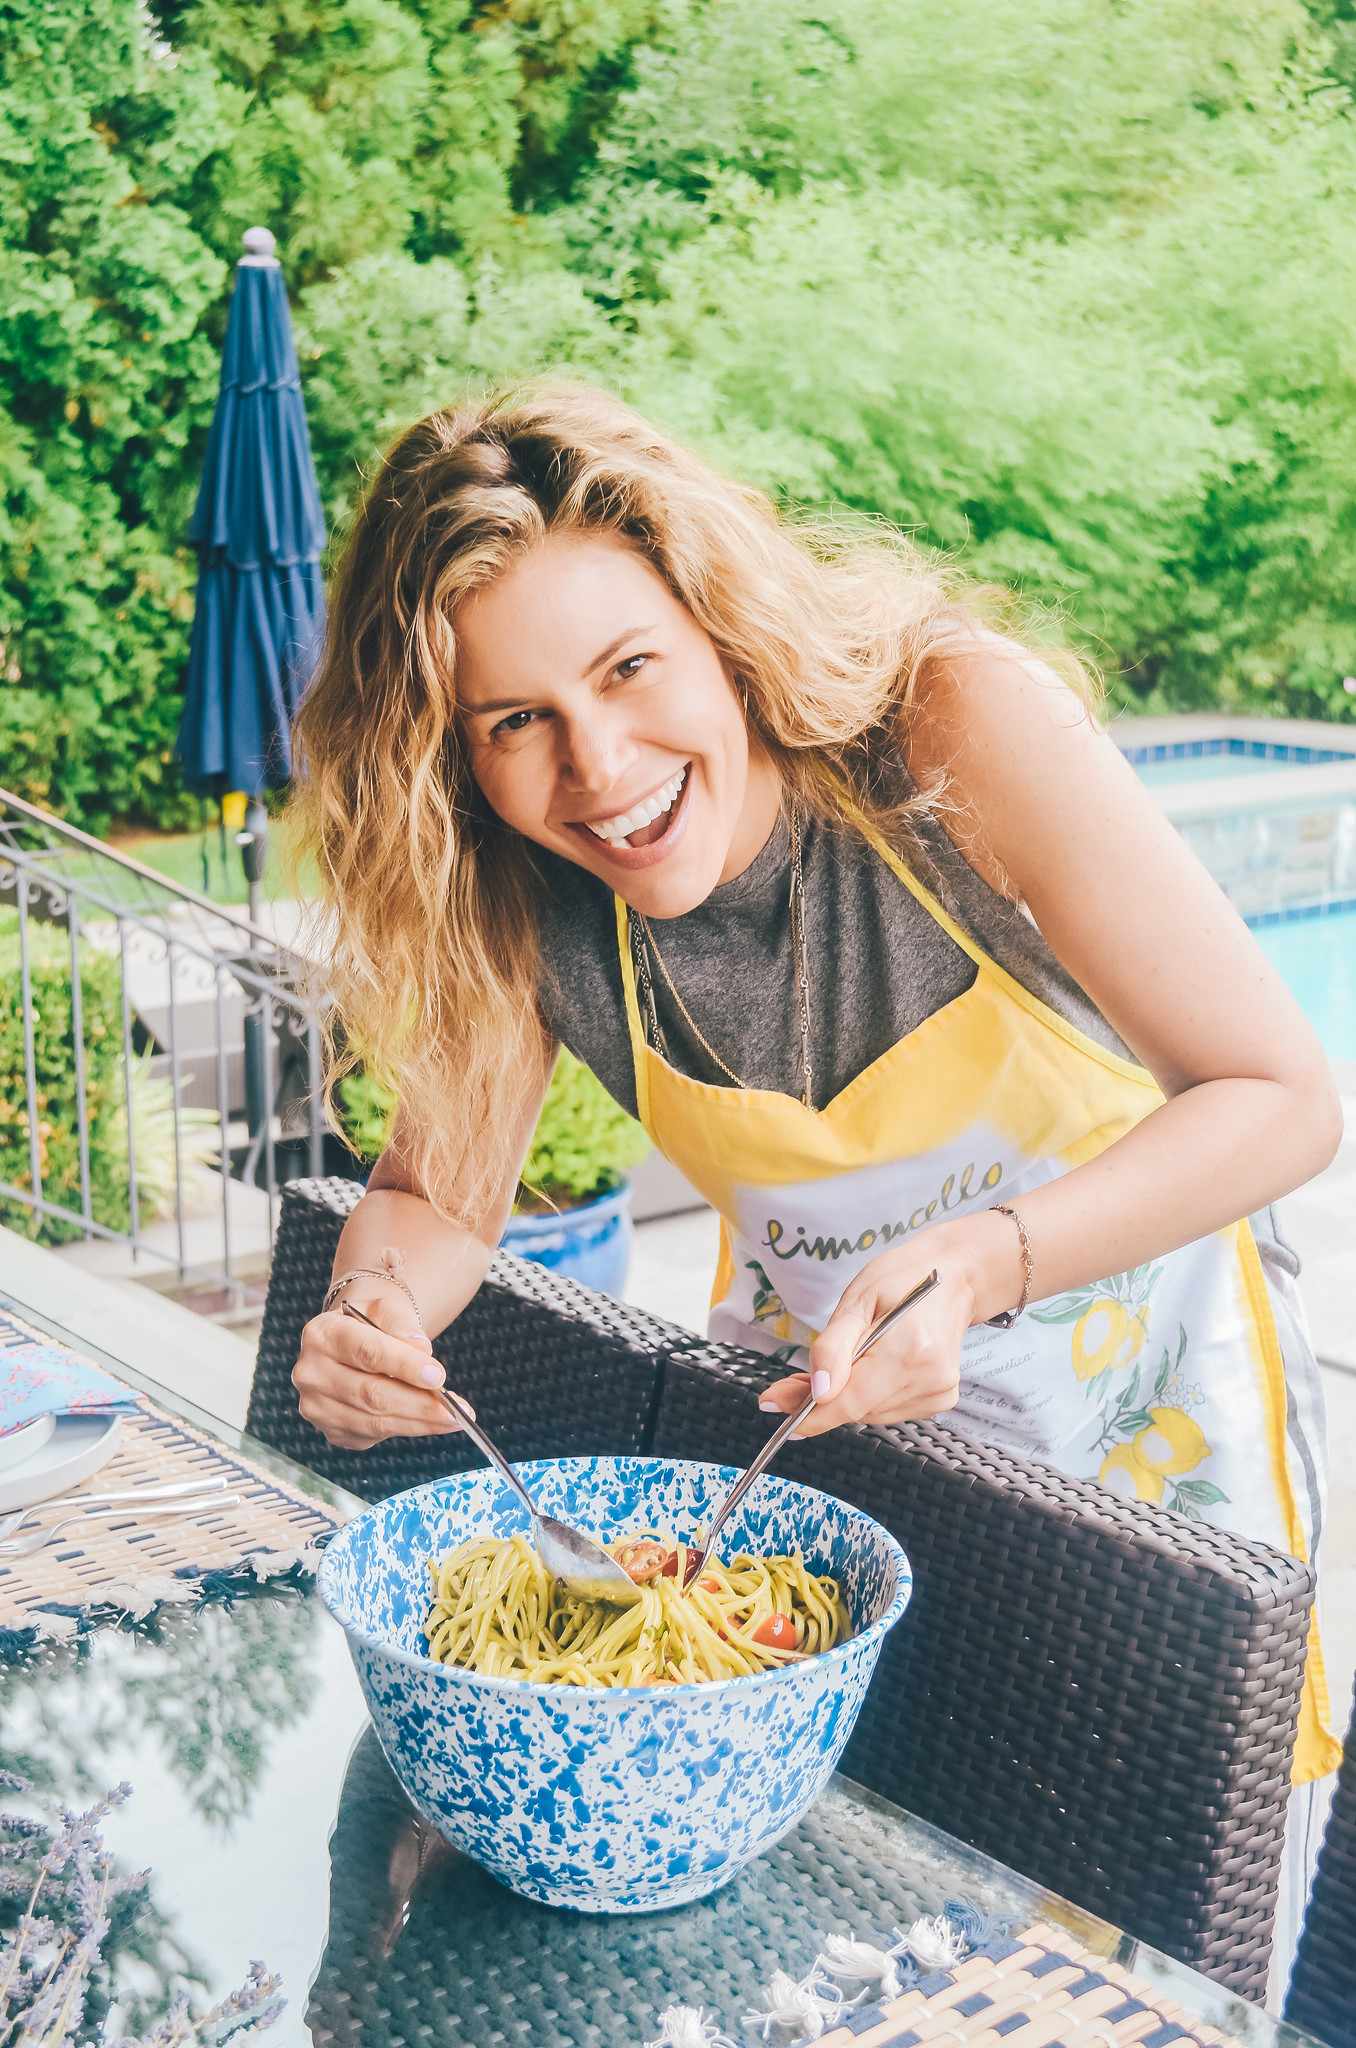
The first step in this almost no cook sauce is to heat the garlic in olive oil over a low simmer, resulting in freshly flavored garlic oil. This garlic infused oil will serve you well; it has endless uses. Simply dip bread in it or use it to roast vegetables, and you’ve already elevated your cooking tenfold. You can make extra and store in a pretty drizzle bottle. It also makes a really cool and unusual hostess gift. Here, the garlic oil is used to marinate the tomatoes while the pasta cooks. Tossing the warm pasta with the tomatoes makes for better flavor blending. That’s a rule in general with pasta or grains.   

Ingredients:

 A package of spinach linguini or any long pasta, a flat variety works too.

Five thinly sliced garlic cloves.

Half cup olive oil.

i-VS4HMm4-X4.jpg

Two pounds heirloom or mixed color cherry tomatoes, cut into wedges or halves.

A cup of torn, fresh basil leaves.

Four tbsp of those tiny capers (I used a whole small jar) rinsed and drained. If you only have the large capers just chop them a bit.

3 tsp grated fresh lemon zest.

A quarter tsp crushed red pepper flakes.

Coarse salt and freshly ground pepper.       

Directions:

Combine garlic and olive oil in a small saucepan and cook on low about ten minutes, until garlic is pale golden. Strain; reserve garlic oil and slivers. Let cool.

Now mix the tomatoes with half a cup of basil, the lemon zest, the capers, the red pepper flakes, and half a tsp salt in a large bowl. Pour garlic slivers and the garlic oil over the tomato mixture. Cover with plastic wrap and marinate room temperature for 30 minutes. Toss gently occasionally.

Cook pasta al dente in salted water. Drain. Add warm pasta to bowl and gently mix. Top with remaining half cup of basil. Season with fresh pepper and add another little sprinkling of lemon zest grated directly over. I like to garnish with three perfect, whole basil leaves in the center of the dish. When serving, make sure you present with a lot of color by gently pushing some of the bright tomatoes to the top of the pile. Color always! This can be made a day ahead if needed, just add the basil right before serving so it doesn’t turn brown overnight. If it’s in the fridge, bring to room temperature before eating. 🥖🥗. Pass the pasta!


i-xxz6cmH-X4.jpg

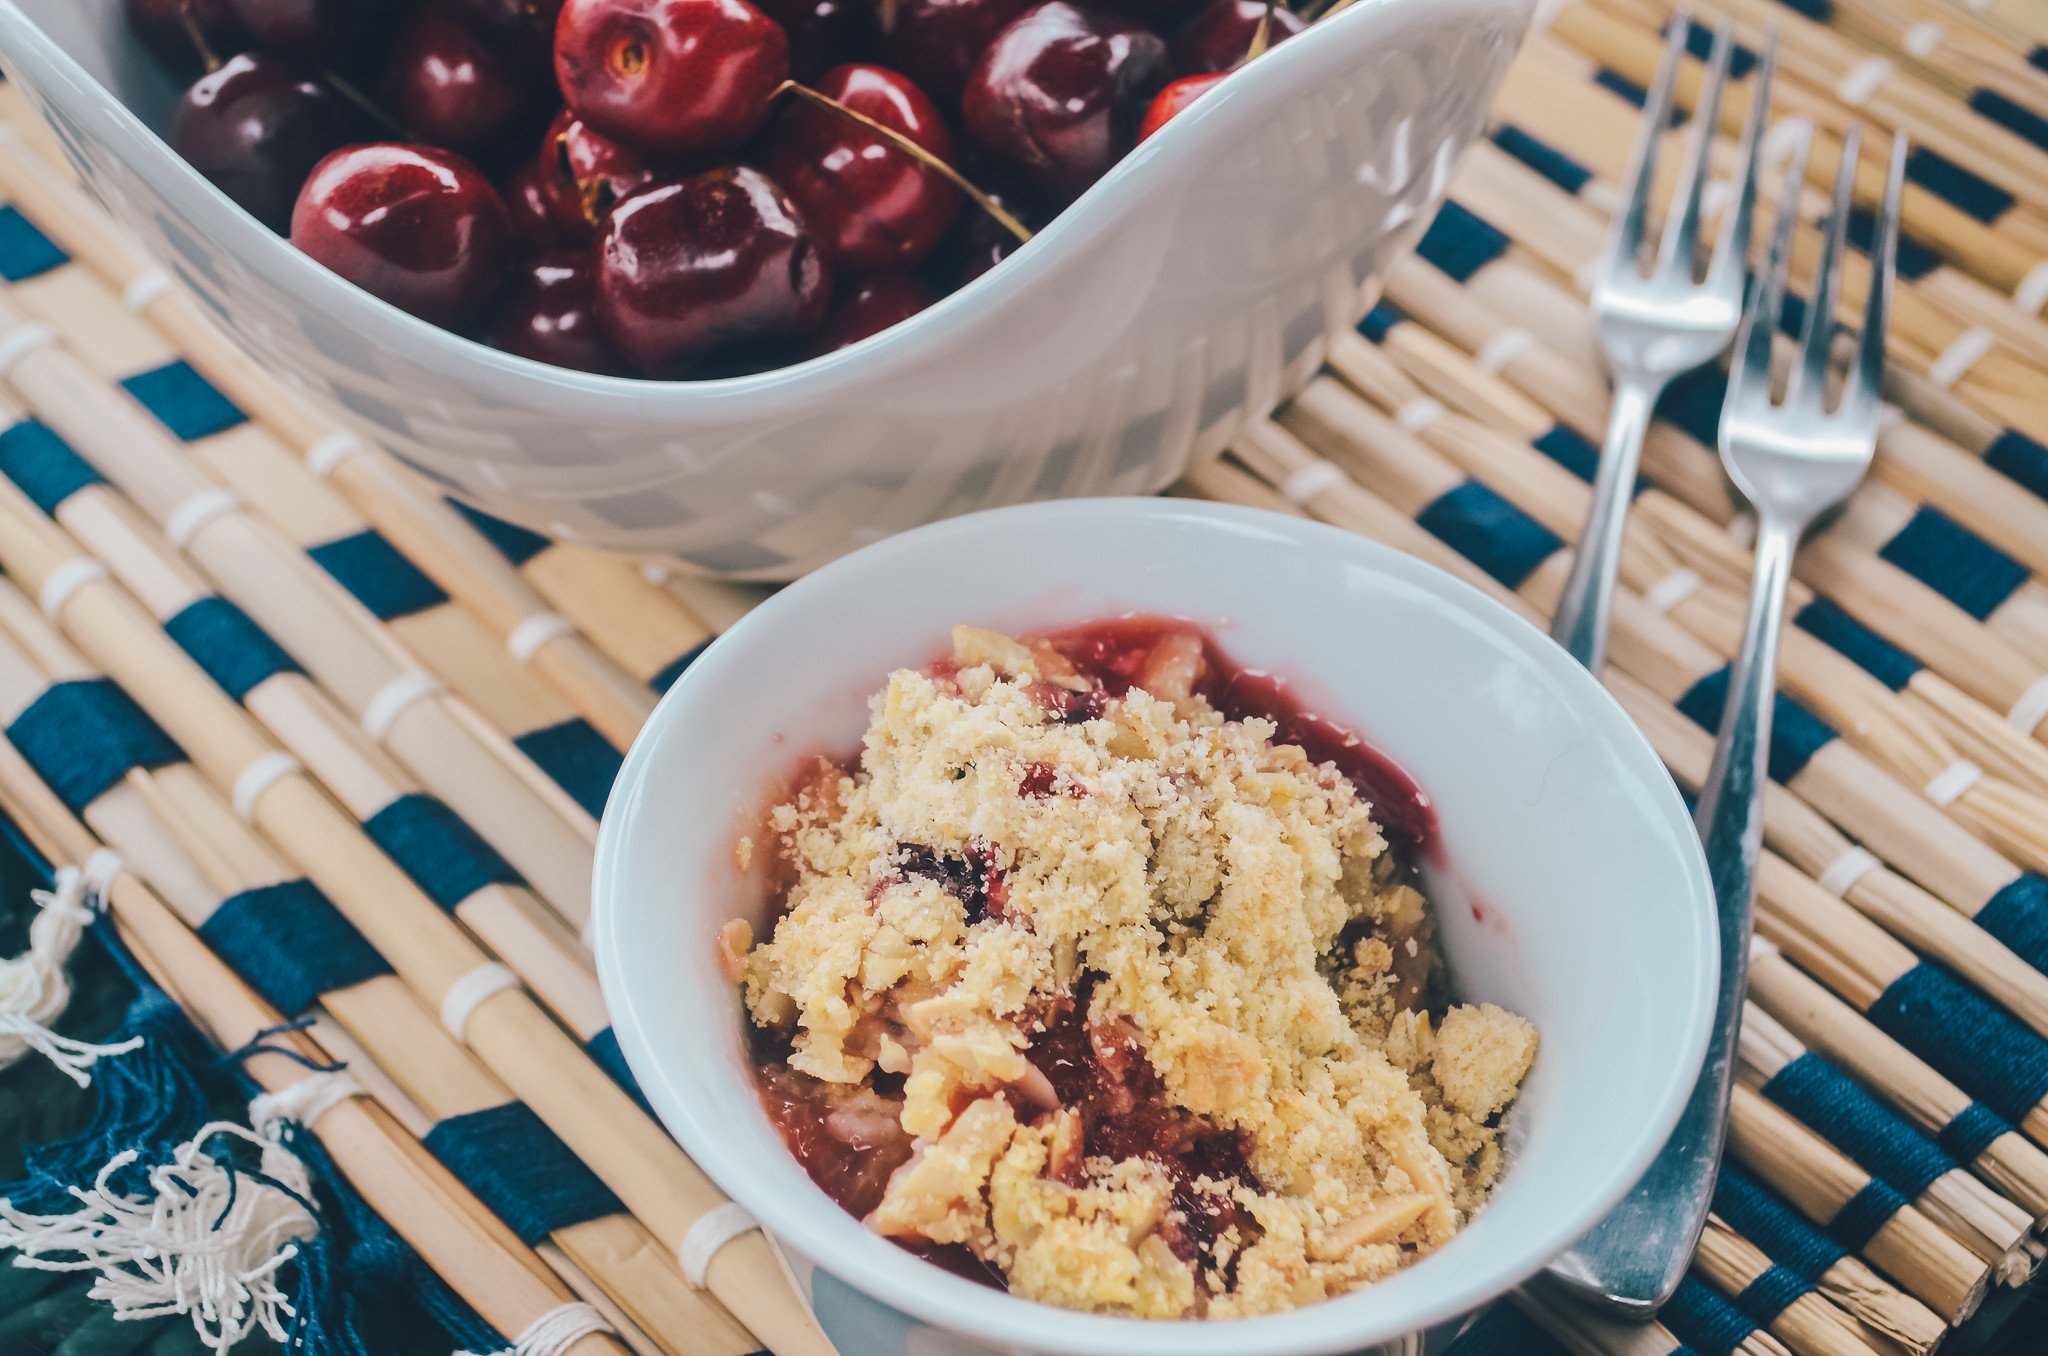
Plum Almond Crumble

i-Qr7TPbT-X4.jpg


I so love working with any kind of stone fruit. It just makes me happy. The summer is the perfect time to do it with peaches and nectarines, and plums will carry you into the earlier part of the Fall too. A crumble is such a wonderful desert because it’s essentially foolproof. Sliced fruit and a basic streusel topping is pretty much impossible to mess up. Even if your topping isn’t great, you can just top the situation with a scoop of vanilla ice cream and no one will hate you. A gently warmed crumble a la mode is always a hit. And the dieters can just pick out the fruit. There is sugar in this recipe though.     

Ingredients:

Three pounds of firm plums cut into thick slices.

A bag of slivered almonds, toasted on low in a dry skillet until fragrant and golden brown (after toasted, set aside to cool). The almonds will be later used in the topping. This will add a depth of flavor and a nice crunch. The plums will get soft while baking, so the crunch of the almond balances out textures. Of course it’s not necessary if you have eaters with allergies.

1 cup of packed light brown sugar.

A quarter cup of flour.

Optional: two tbsp raspberry liquor.

Directions:

Heat oven to 350. Mix all gently, except the almonds, and put in a greased large dish. Topping; one stick of butter, one cup old fashioned oats, half tsp salt, one and a half cup of flour, half a cup of sugar, three quarters cup of packed light brown, and the two cups of toasted almond slivers. Sprinkle the topping evenly over the plums and bake until topping is golden brown, 45 minutes to one hour. Let cool slightly before serving. Can be made two days in advance and gently heated up before eating. The ice scream scoop is always a welcome addition, and would look nice with some extra almond slivers sprinkled on top🥄.


i-T83jz2G-X4.jpg

Green Omelette

i-6GXxPwr-X4.jpg

Don’t panic; this isn’t a gross take on Green Eggs and Ham. I know we all love the classic Dr Seuss tale, but I’m leaving colored out of this one. This healthy dish is so simple to make, and is perfect for any meal. While serving lunch to some friends, I needed to prepare something purely protein and plant based, to balance out the two pasta dishes I made. Adding mixed greens under a standard omelette instantly elevated basic eggs. I sautéed chopped scallions and mixed those with blanched asparagus, which I then put on top of the omelette. So easy right??? Any vegetables you have on hand will do here, as will any greens to go underneath. I don’t like cheese, but I’d guess goat or fontina would work here in some capacity. This looked pretty; green, yellow, green . Making one large omelette and slicing it into wedges looked really cute, and could not have been more of a time savor. I platted this to make it more sophisticated looking. Done and done✅.

Ingredients:

 Four cups of mixed greens, spinach, or kale massaged in olive oil to soften (omg, ewwwww).

Eight eggs beaten, and seasoned with some salt and pepper. Use this to make an omelette, which you will cut into wedges.

A bunch of asparagus, blanched in salted boiling water for three minutes, then plunged in an ice bath to cool.

Two bunches of scallions, chopped and sautéed.

That’s it Peeps; platter the greens, top with egg wedges, then again top with sautéed asparagus and scallions. Fresh, simple, farm to table, and beyond healthy. I’m imagining Mr Burns from the Simpsons saying “excellent”, only as “eggs-cellent”. Omg, I’m the worst but never changing.      PS; if you don’t know what an ice bath is after blanching; boil a pot of salted water. Blanch vegetables for three minutes until bright green, then quickly remove and put in a pre prepared bowl of ice water. This stops the cooking process, and will retain crispness and that bright green color.


i-NWnns2N-X4.jpg